
Overview
Taskify supports integration with the WhatsApp Cloud API, enabling you to send real-time notifications directly to WhatsApp. Unlike project/task notifications (which remain in Taskify), WhatsApp is ideal for external communication with clients or for critical alerts that require quick responses.
By configuring the WhatsApp Cloud API, you can automate communication such as task assignments, reminders, project updates, and client messages.
Prerequisites
Before you begin, ensure you have:
A verified Facebook Developer account.
A registered WhatsApp Business Account (WABA).
Access Token (temporary or permanent).
Phone Number ID linked to your WhatsApp Business Account.
At least one approved message template in WhatsApp.
⚠️ Note: WhatsApp requires business verification for production use. Test mode works with temporary tokens.
Step 1: Access Facebook Developer Dashboard
Go to Facebook for Developers.
Log in with your developer account.
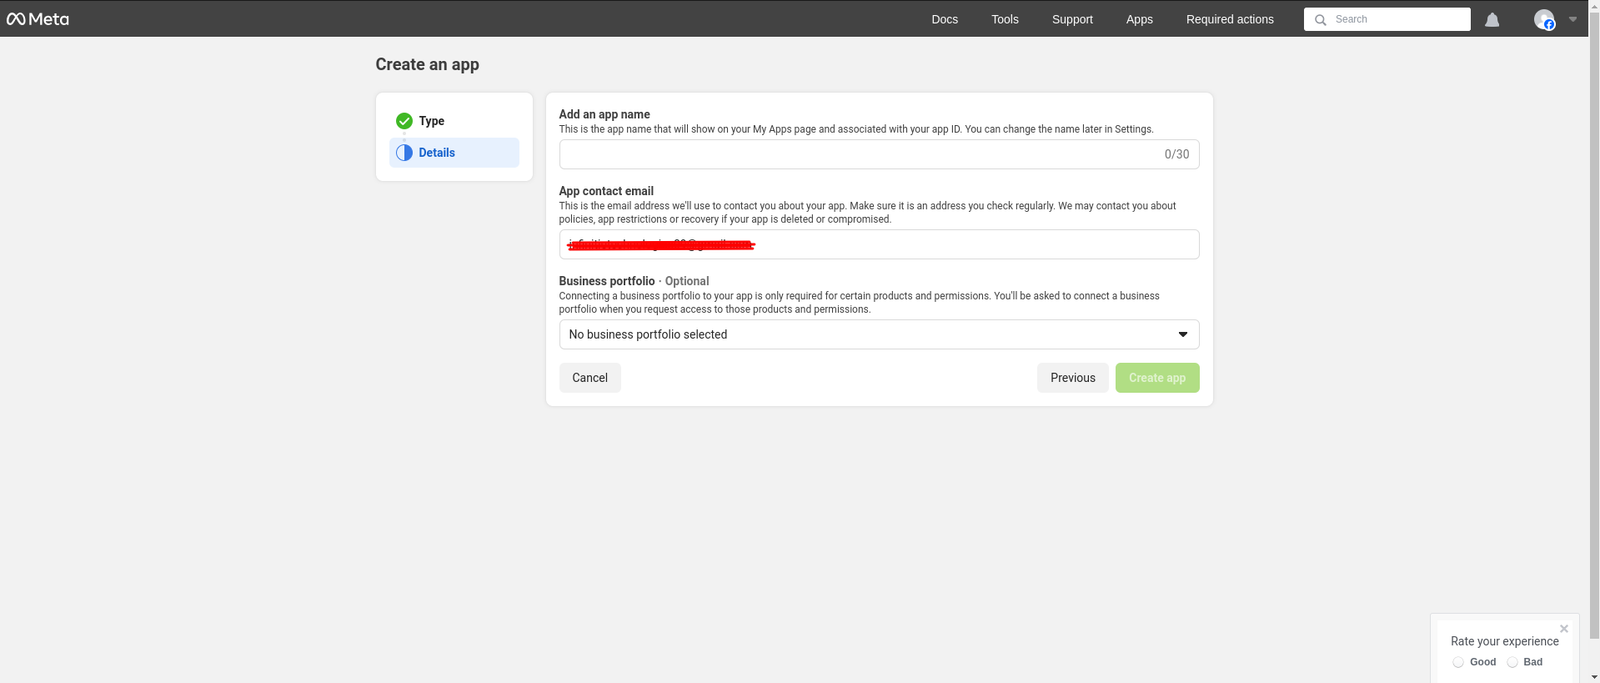
Navigate to My Apps → Create App.
Select Business as the app type.
Name your app (e.g., “Taskify WhatsApp Integration”) and click Create App.
Step 2: Add WhatsApp to Your App
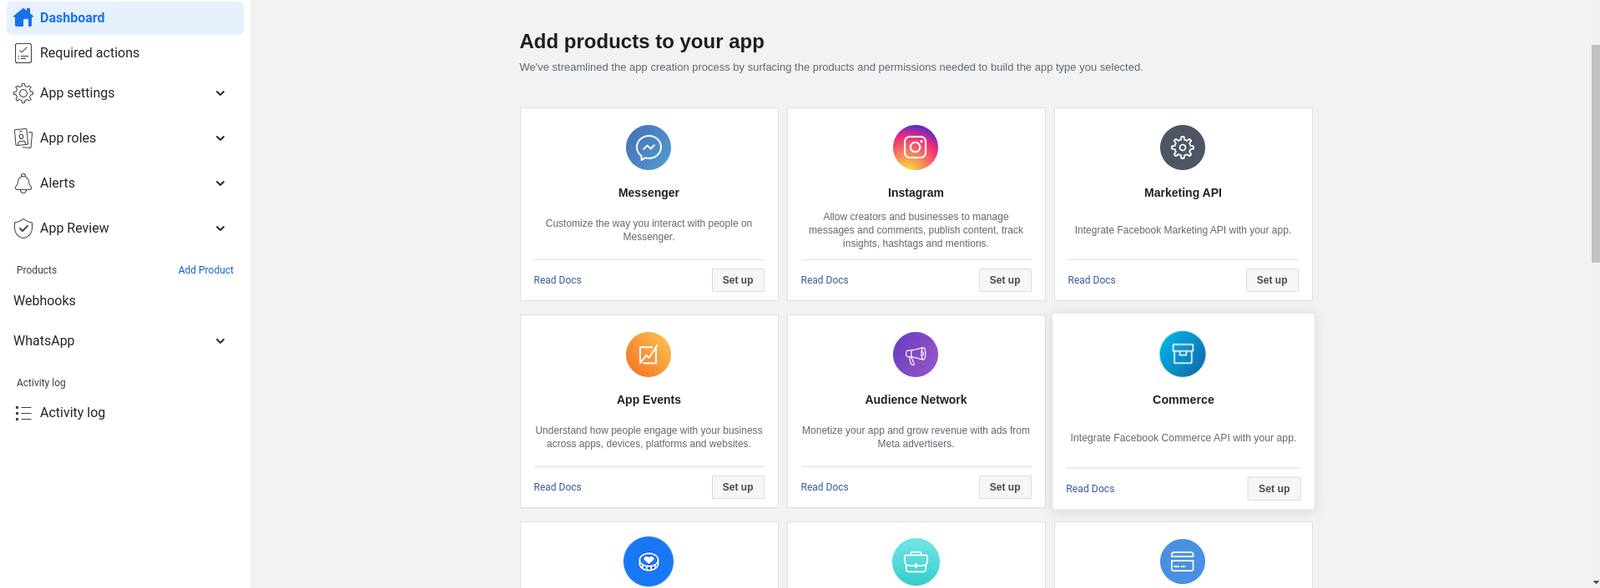
From the left sidebar, click Add Product.
Select WhatsApp and click Set Up.
Connect your WhatsApp Business Account.
Facebook may require you to complete business verification at this step.
Step 3: Get Access Token and Phone Number ID
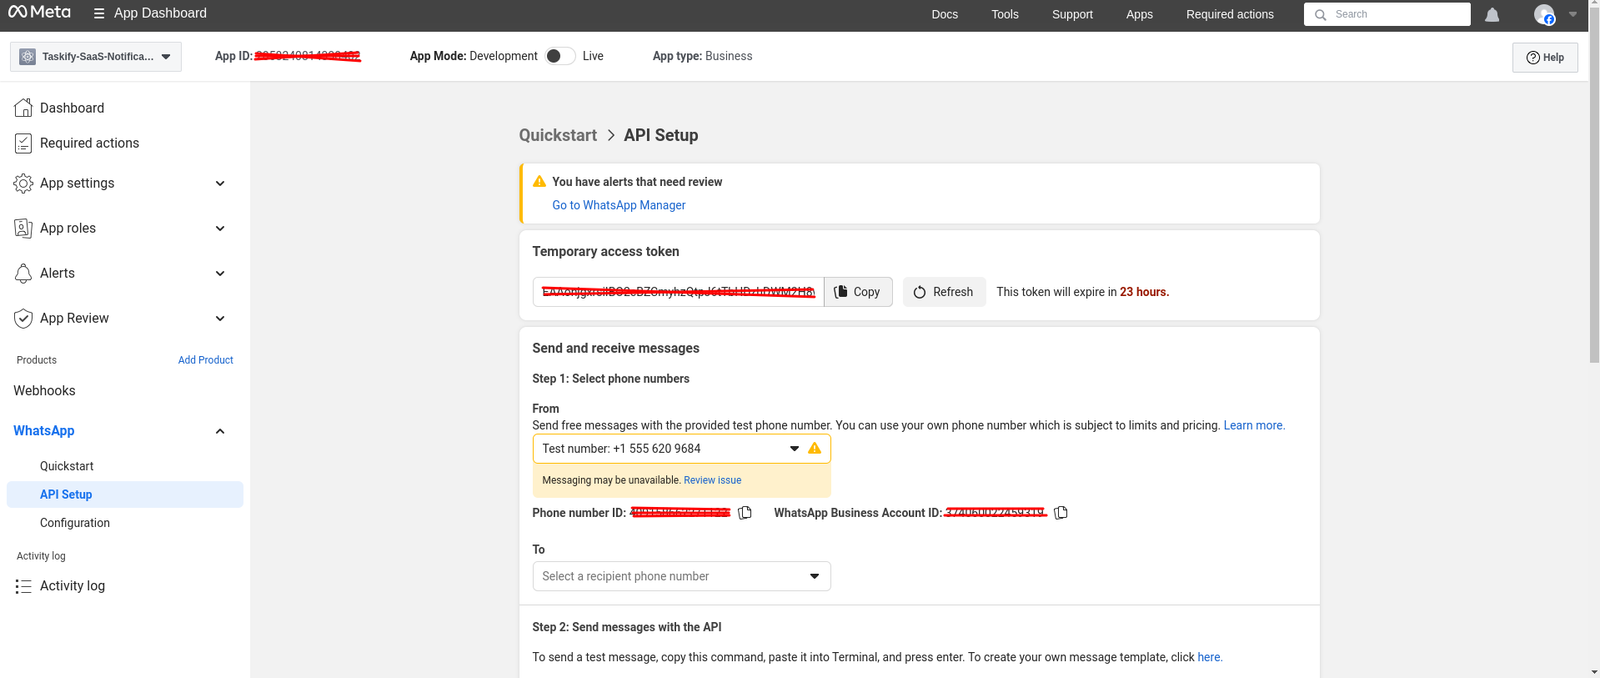
In the WhatsApp → Getting Started section, copy the following:
Temporary Access Token (valid for 24 hours).
Phone Number ID (linked to your WABA).
To create a Permanent Access Token:
Go to Business Settings → Users → System Users.
Create a new System User with the Admin role.
Assign the WhatsApp Business Account with
whatsapp_business_messagingandbusiness_managementpermissions.Click Generate Token → select “Never Expire”.
Copy and store this token securely.
💡 Alternative: Use the Graph API to exchange short-lived tokens for long-lived ones.
Step 4: Configure WhatsApp in Taskify
Log in to your Taskify Admin Panel.
Navigate to:
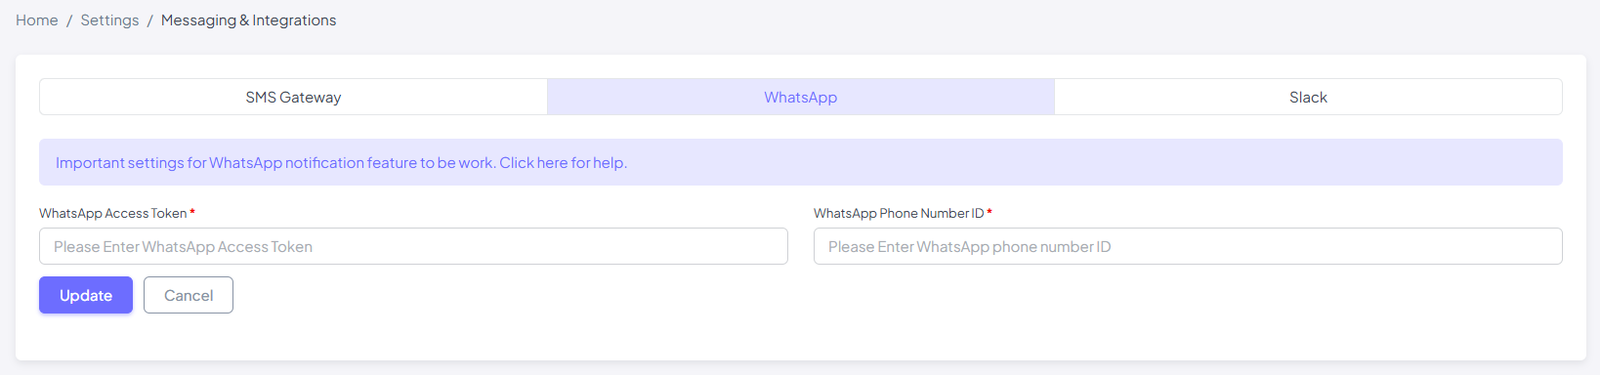
Settings → Messaging & Integrations → WhatsApp.Enter the following:
Phone Number ID
Permanent Access Token
Click Save Configuration.
Step 5: Test the Integration
From the WhatsApp settings page, click Send Test Message.
Enter a valid WhatsApp number (including country code).
If successful, you will receive a WhatsApp message from your configured number.
Best Practices
Always use a Permanent Access Token for production.
Store credentials in
.envfile for security.Use approved message templates only (random messages may be blocked).
Keep tokens secure and private.